Hello, we’re Flexcil.
I believe that many of you are using an app called Notion a lot these days.
Notion is a work productivity tool that is highly used by many people.
If you sign up with your school account, you can use the “personal pro” plan for free, which originally costs $4 a month to subscribe, so many students are using it.
There is no restriction on uploading files on the personal pro plan, so it’s best to manage learning materials!
Did you know that it is possible to write and manage learning materials more effectively if you use Flexcil with Notion?
You can also download and use Flexcil for free, so students can make their own study note archives without paying!
Notion itself supports excellent memo function and PDF document embeddings, so you can write notes and manage class materials only with Notion, but if you use Flexcil, you can freely write and save documents and notes using handwriting, a feature that is not provided in Notion.
Today we’re going to show you how to create a class notes archive using the templates provided by Notion.
I am still learning how to use Notion so this post might contain basic things about Notion, but let me start!
Notion provides a variety of templates, including their own templates and templates that are created by users. Among them, I am thinking of using the lecture note template provided by Notion to proceed with the initial setting.

Setting up an archive
When you create a Notion account for the first time, you can see the screen below. If you select the ‘Template’ menu at the bottom left, you can see the various templates provided by Notion.
By using this template, you can easily set notes up that serve your purpose.
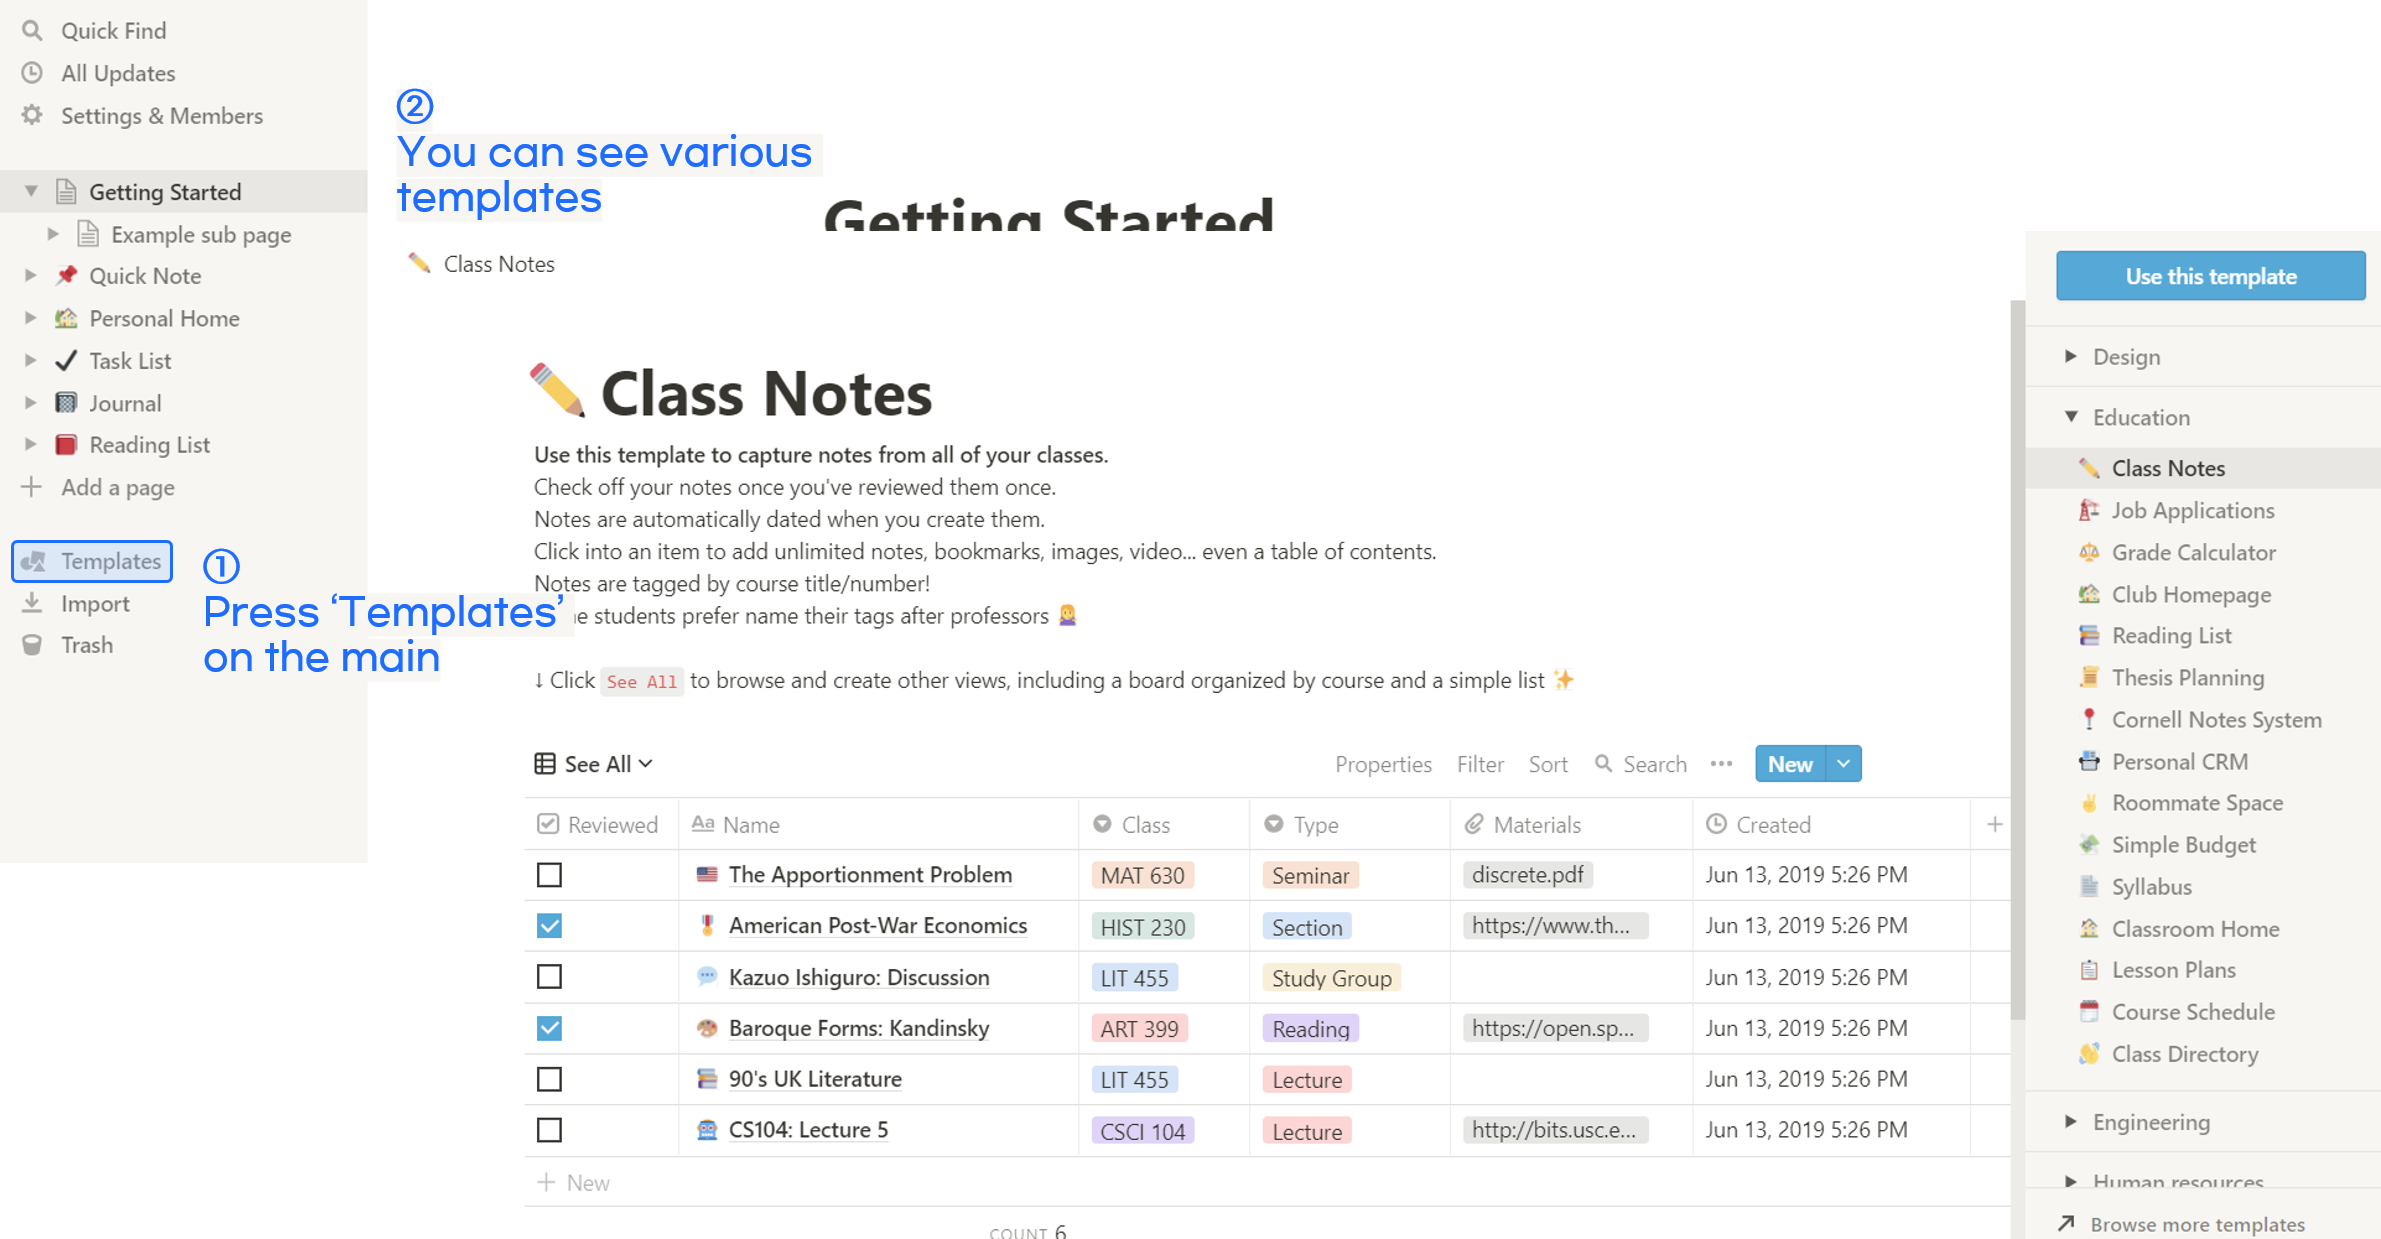
Since I’m going to use the ‘Class Notes’ template, you can select the Education>Class Notes>Lecture Notes and then press the ‘Use this Template’ button.
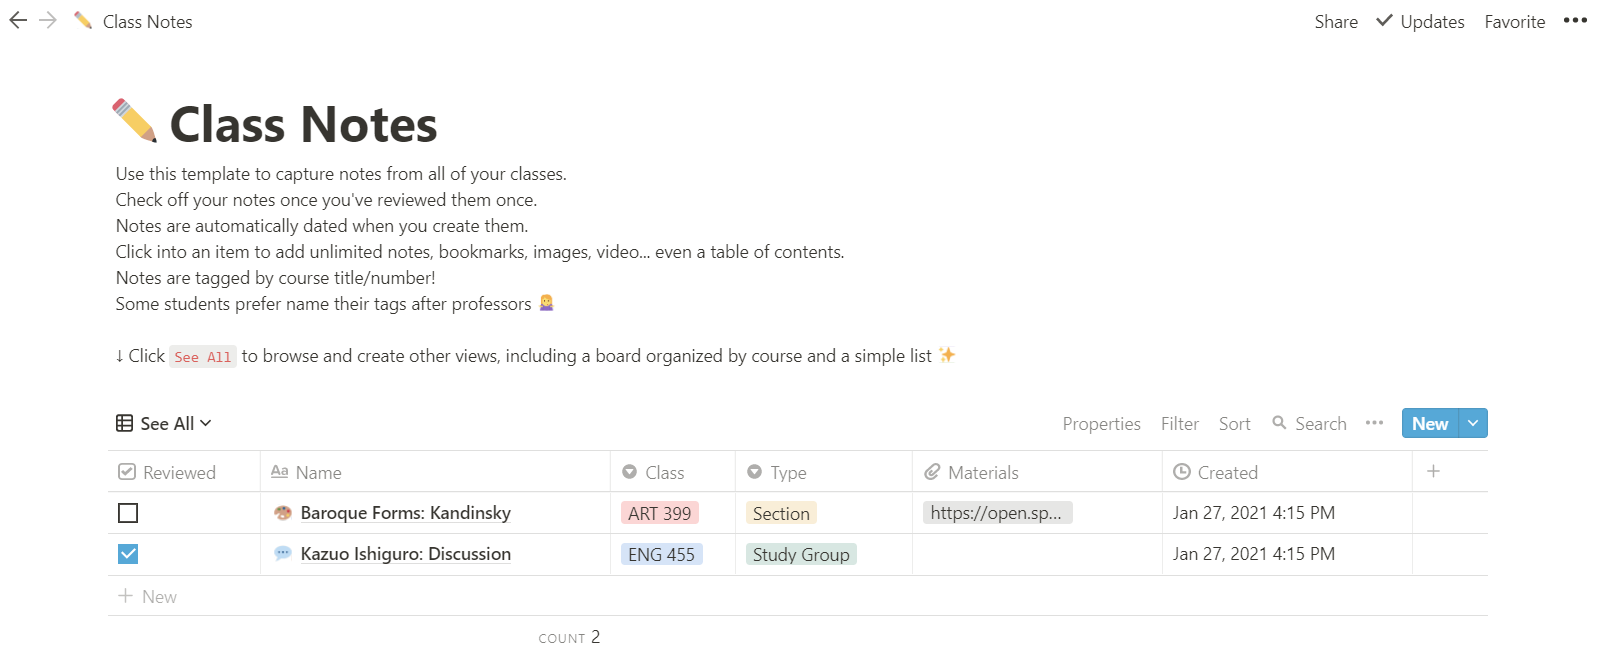
Tada~ The lecture note template has been created.
The generated template is basically divided into ‘review’, ‘course name’, ‘course number’, ‘type’, ‘data’ and ‘date and time’. You can customize this table to suit your individual needs.
I organized the table by leaving things I need and by revising a few things. Also, I randomly created a course list.
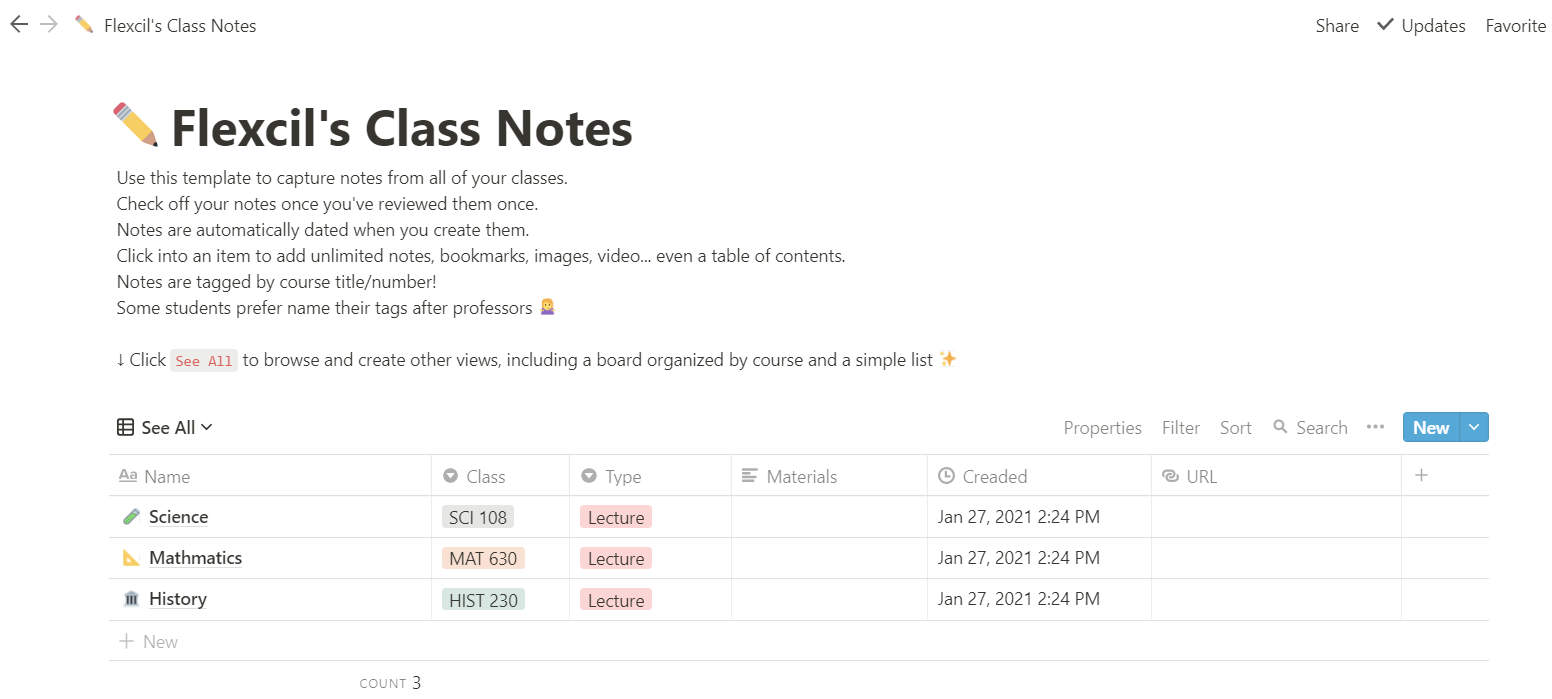
Creating a lecture note archive for each class
Now, shall we create a lecture note archive for each class?
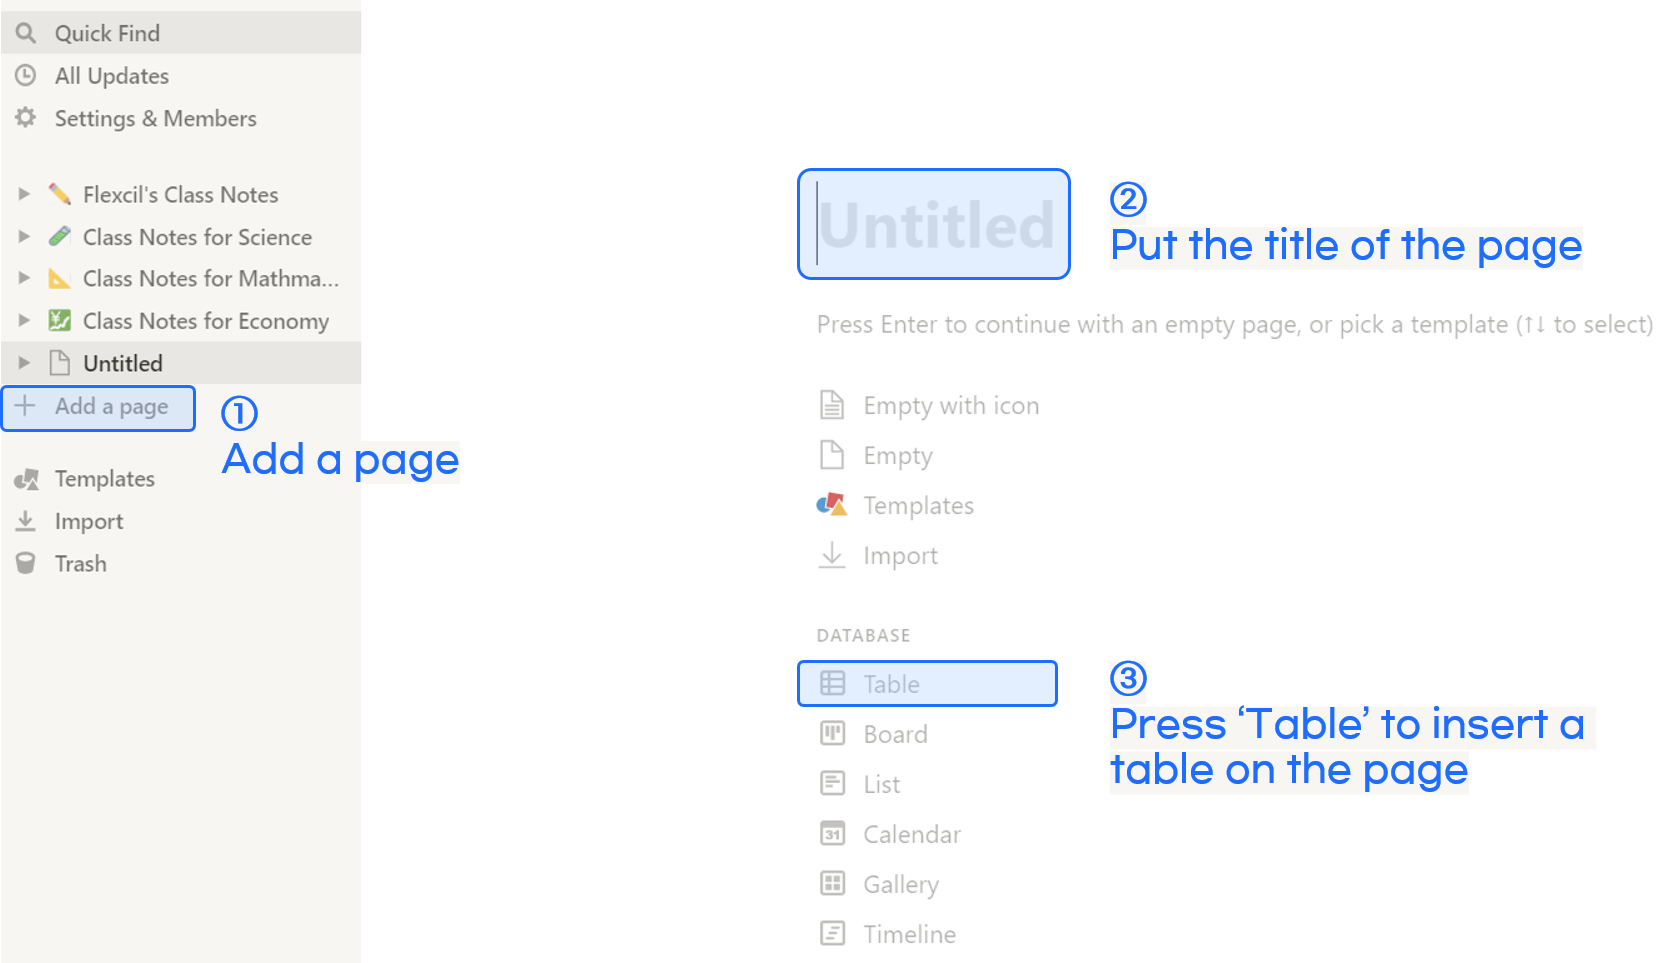
First, I’ll make a new page.
If you click the ‘+ Add a Page’ button on the bottom left of the main screen, a new page will be created.
Please write down the course name.
I created a page with the name ‘Class Notes for Economy’. If you choose the icon, it will be easy to distinguish and will be better to look at also.
After writing the title, click ‘Table’ to create a table!
The ‘name’ and ‘tag’ items are created as basics, but I am going to put a ‘date’ instead of a ‘tag’. This makes it easier for you to manage because without including the date on the file name, the creation date is automatically listed when you upload a note.
To create a new item, click the ‘+’ button in the table and select the property type. Since we want to mark the creation date of the uploaded note automatically, please select ‘Creation Date’.
You can find the creation date in the section below!
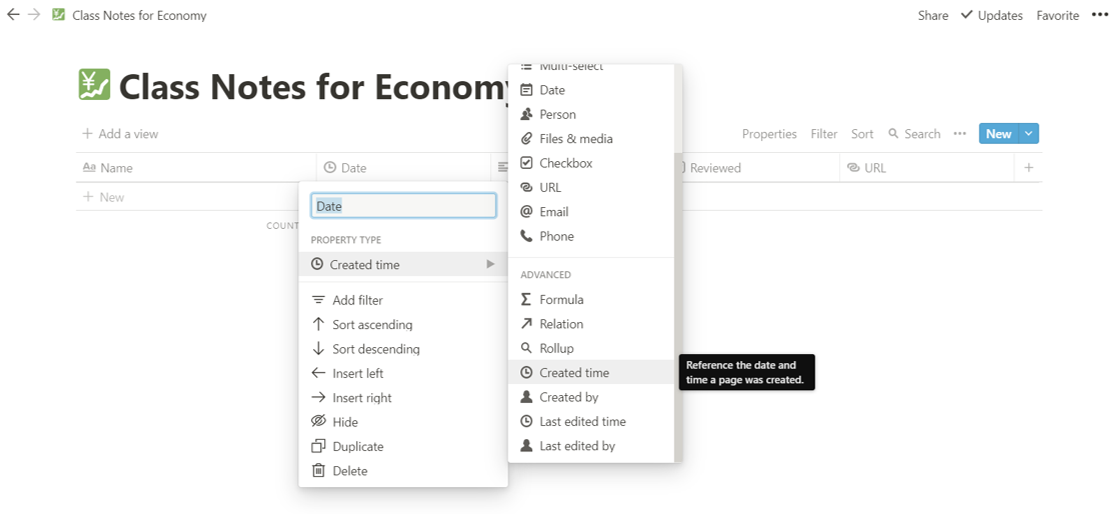
Okay, so the archive is finished. Simple, right?

If you have something you want to add, you can add more.
For example, you could add ‘file and media’ and locate documents or images for a reference or you could add ‘URL’ and locate the webpage links for a reference.
Link note archive
If you attach a link to the first table you have made, you can easily move to that archive.
Click the three dots icon on the right and press ‘Copy Link’. To make it even simpler, you can simply press ‘Control+L’!
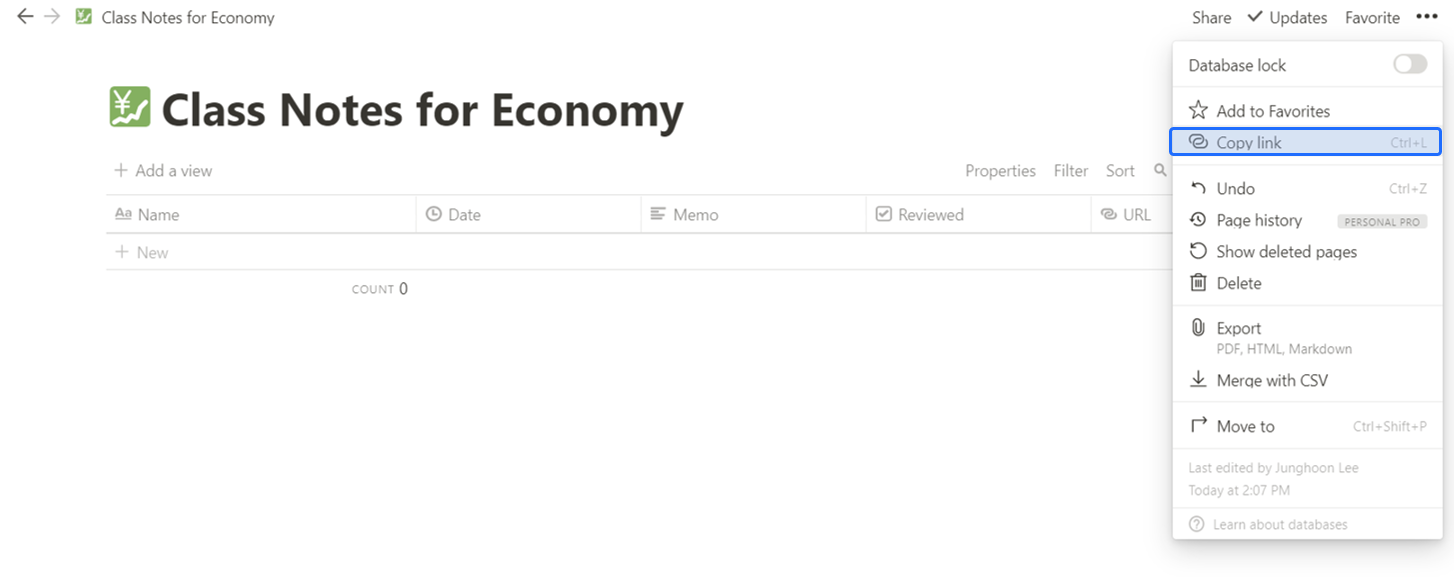
Now let’s add this link to the table to make it easier to get to the archive!
After you return to the table and enter the text, drag and select to pop up the option to add the ‘link’, and you can link a page by pasting (Control+V) it.

Making a lecture note in Flexcil and uploading it in Notion
Now, let’s upload the notes from Flexcil to the archive.
What you need are two apps: Flexcil and Notion. Please install these apps first 🙂
Once again, you can download Flexcil for free!
We are going to create a lecture note in Flexcil. To create a new note, click the blue, round ‘+’ icon which is in the lower right corner of the app’s main screen. I think it would be easier to manage your notes if you create a note with the course name.
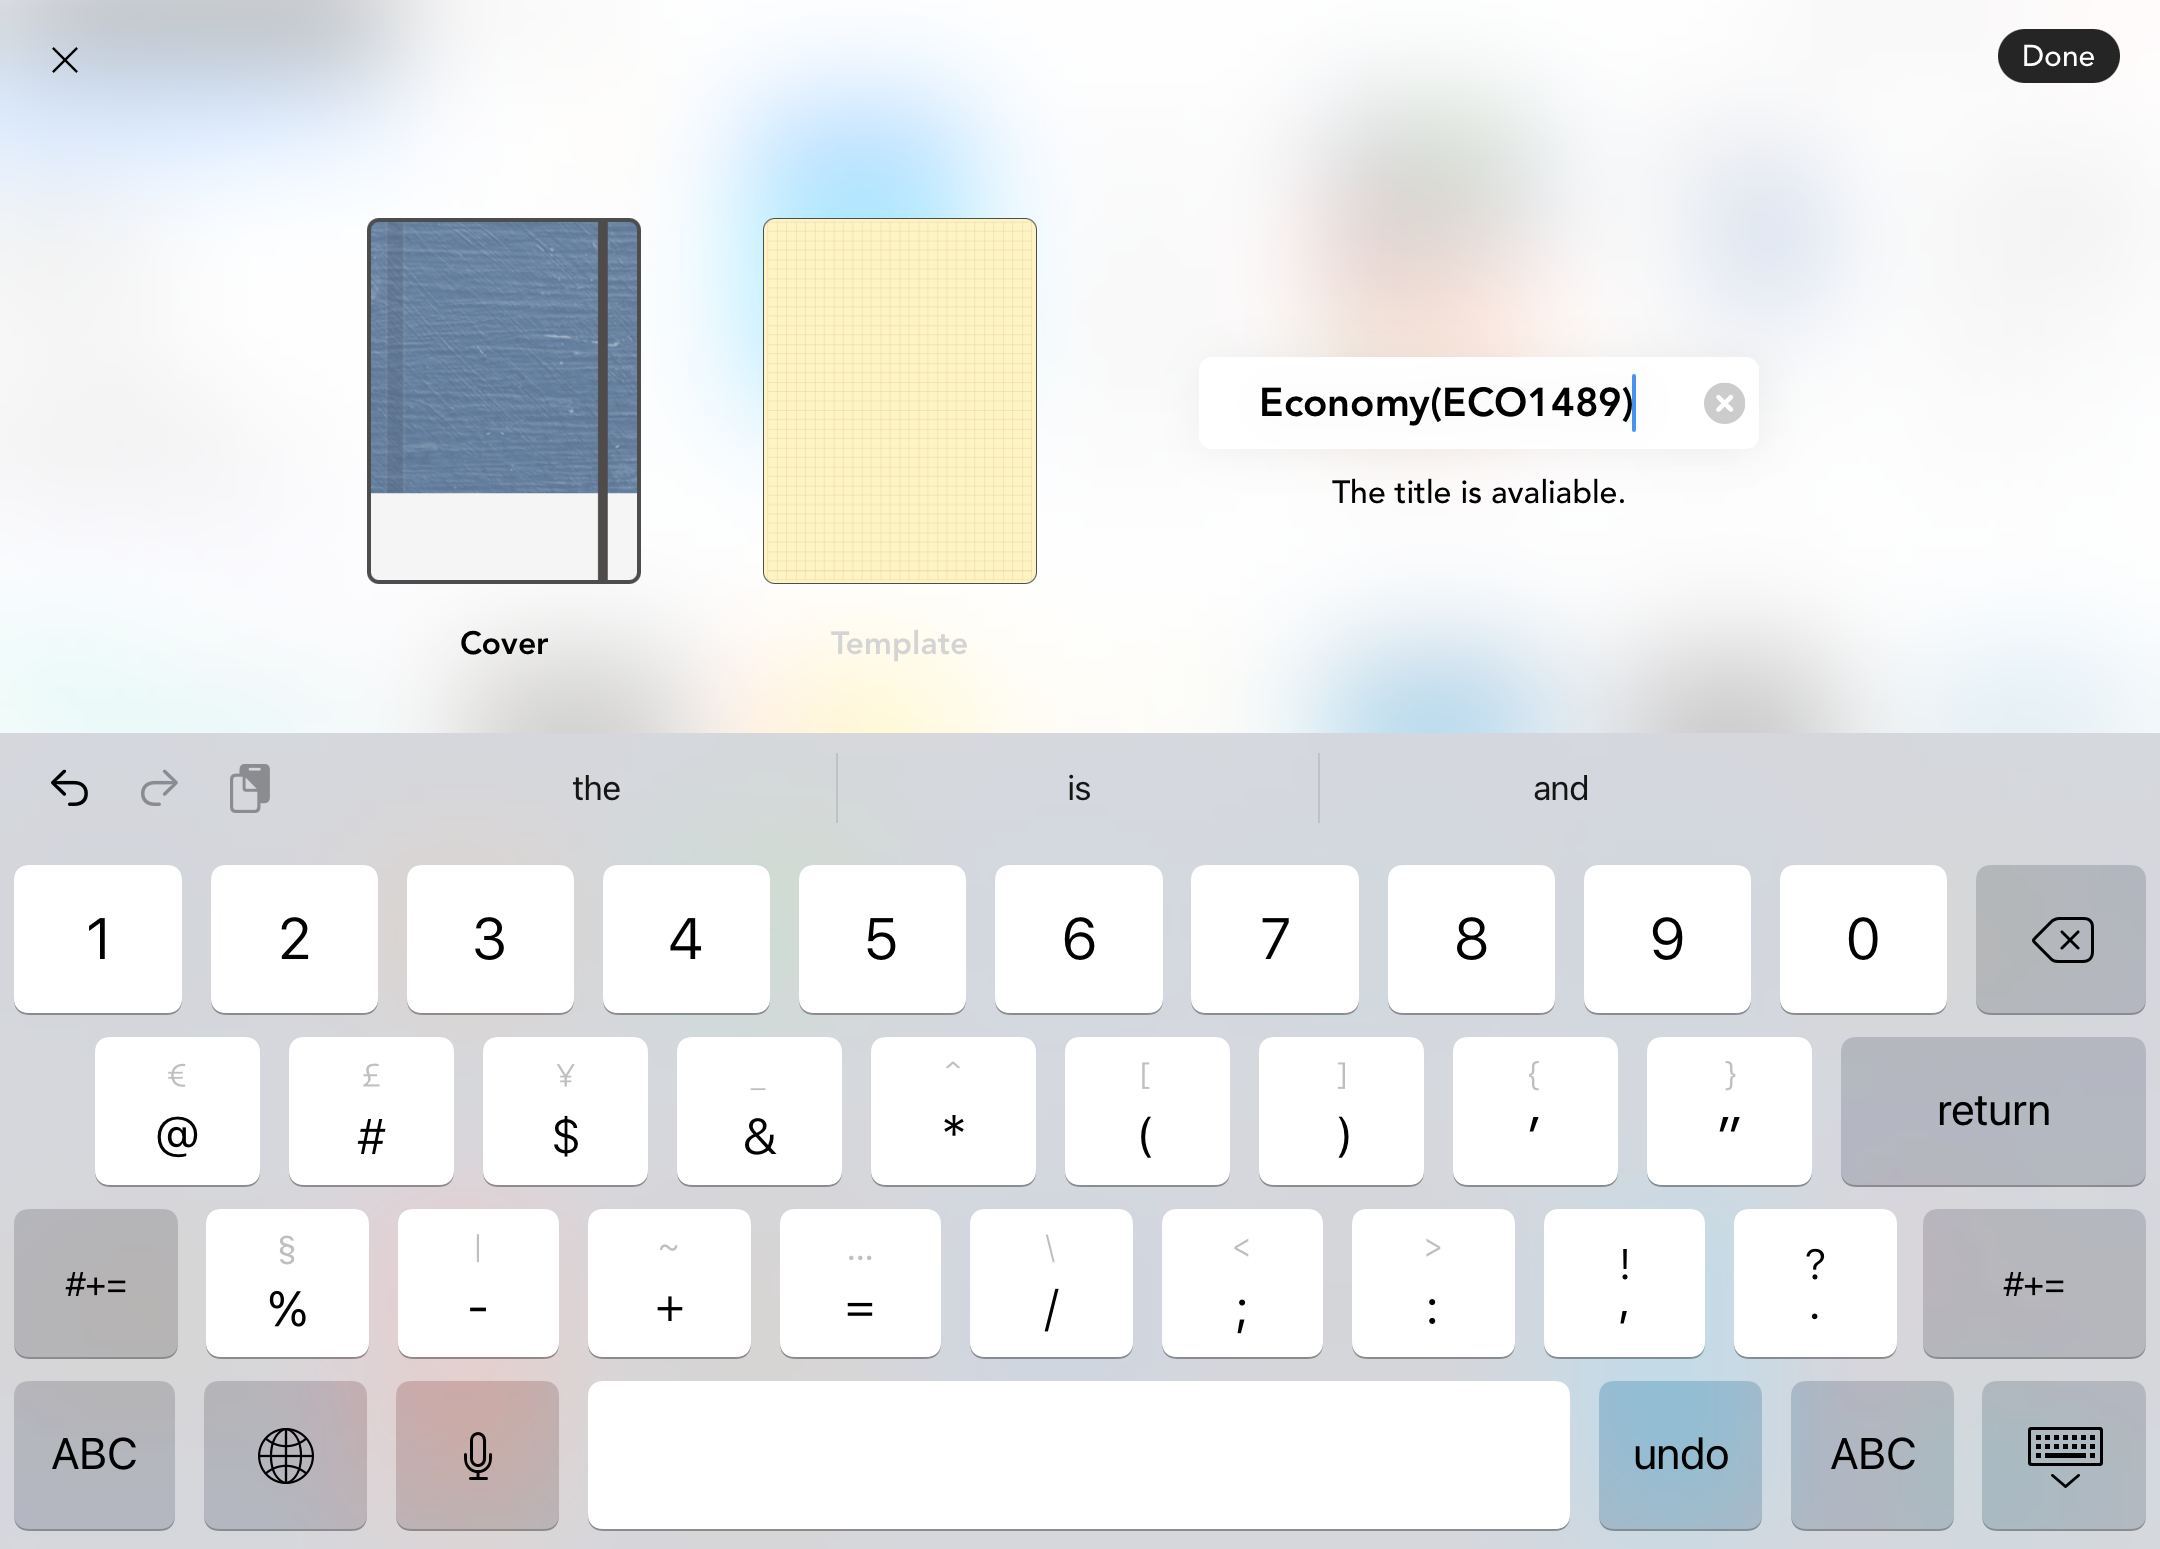
Since we created a new note, why don’t we start taking notes?
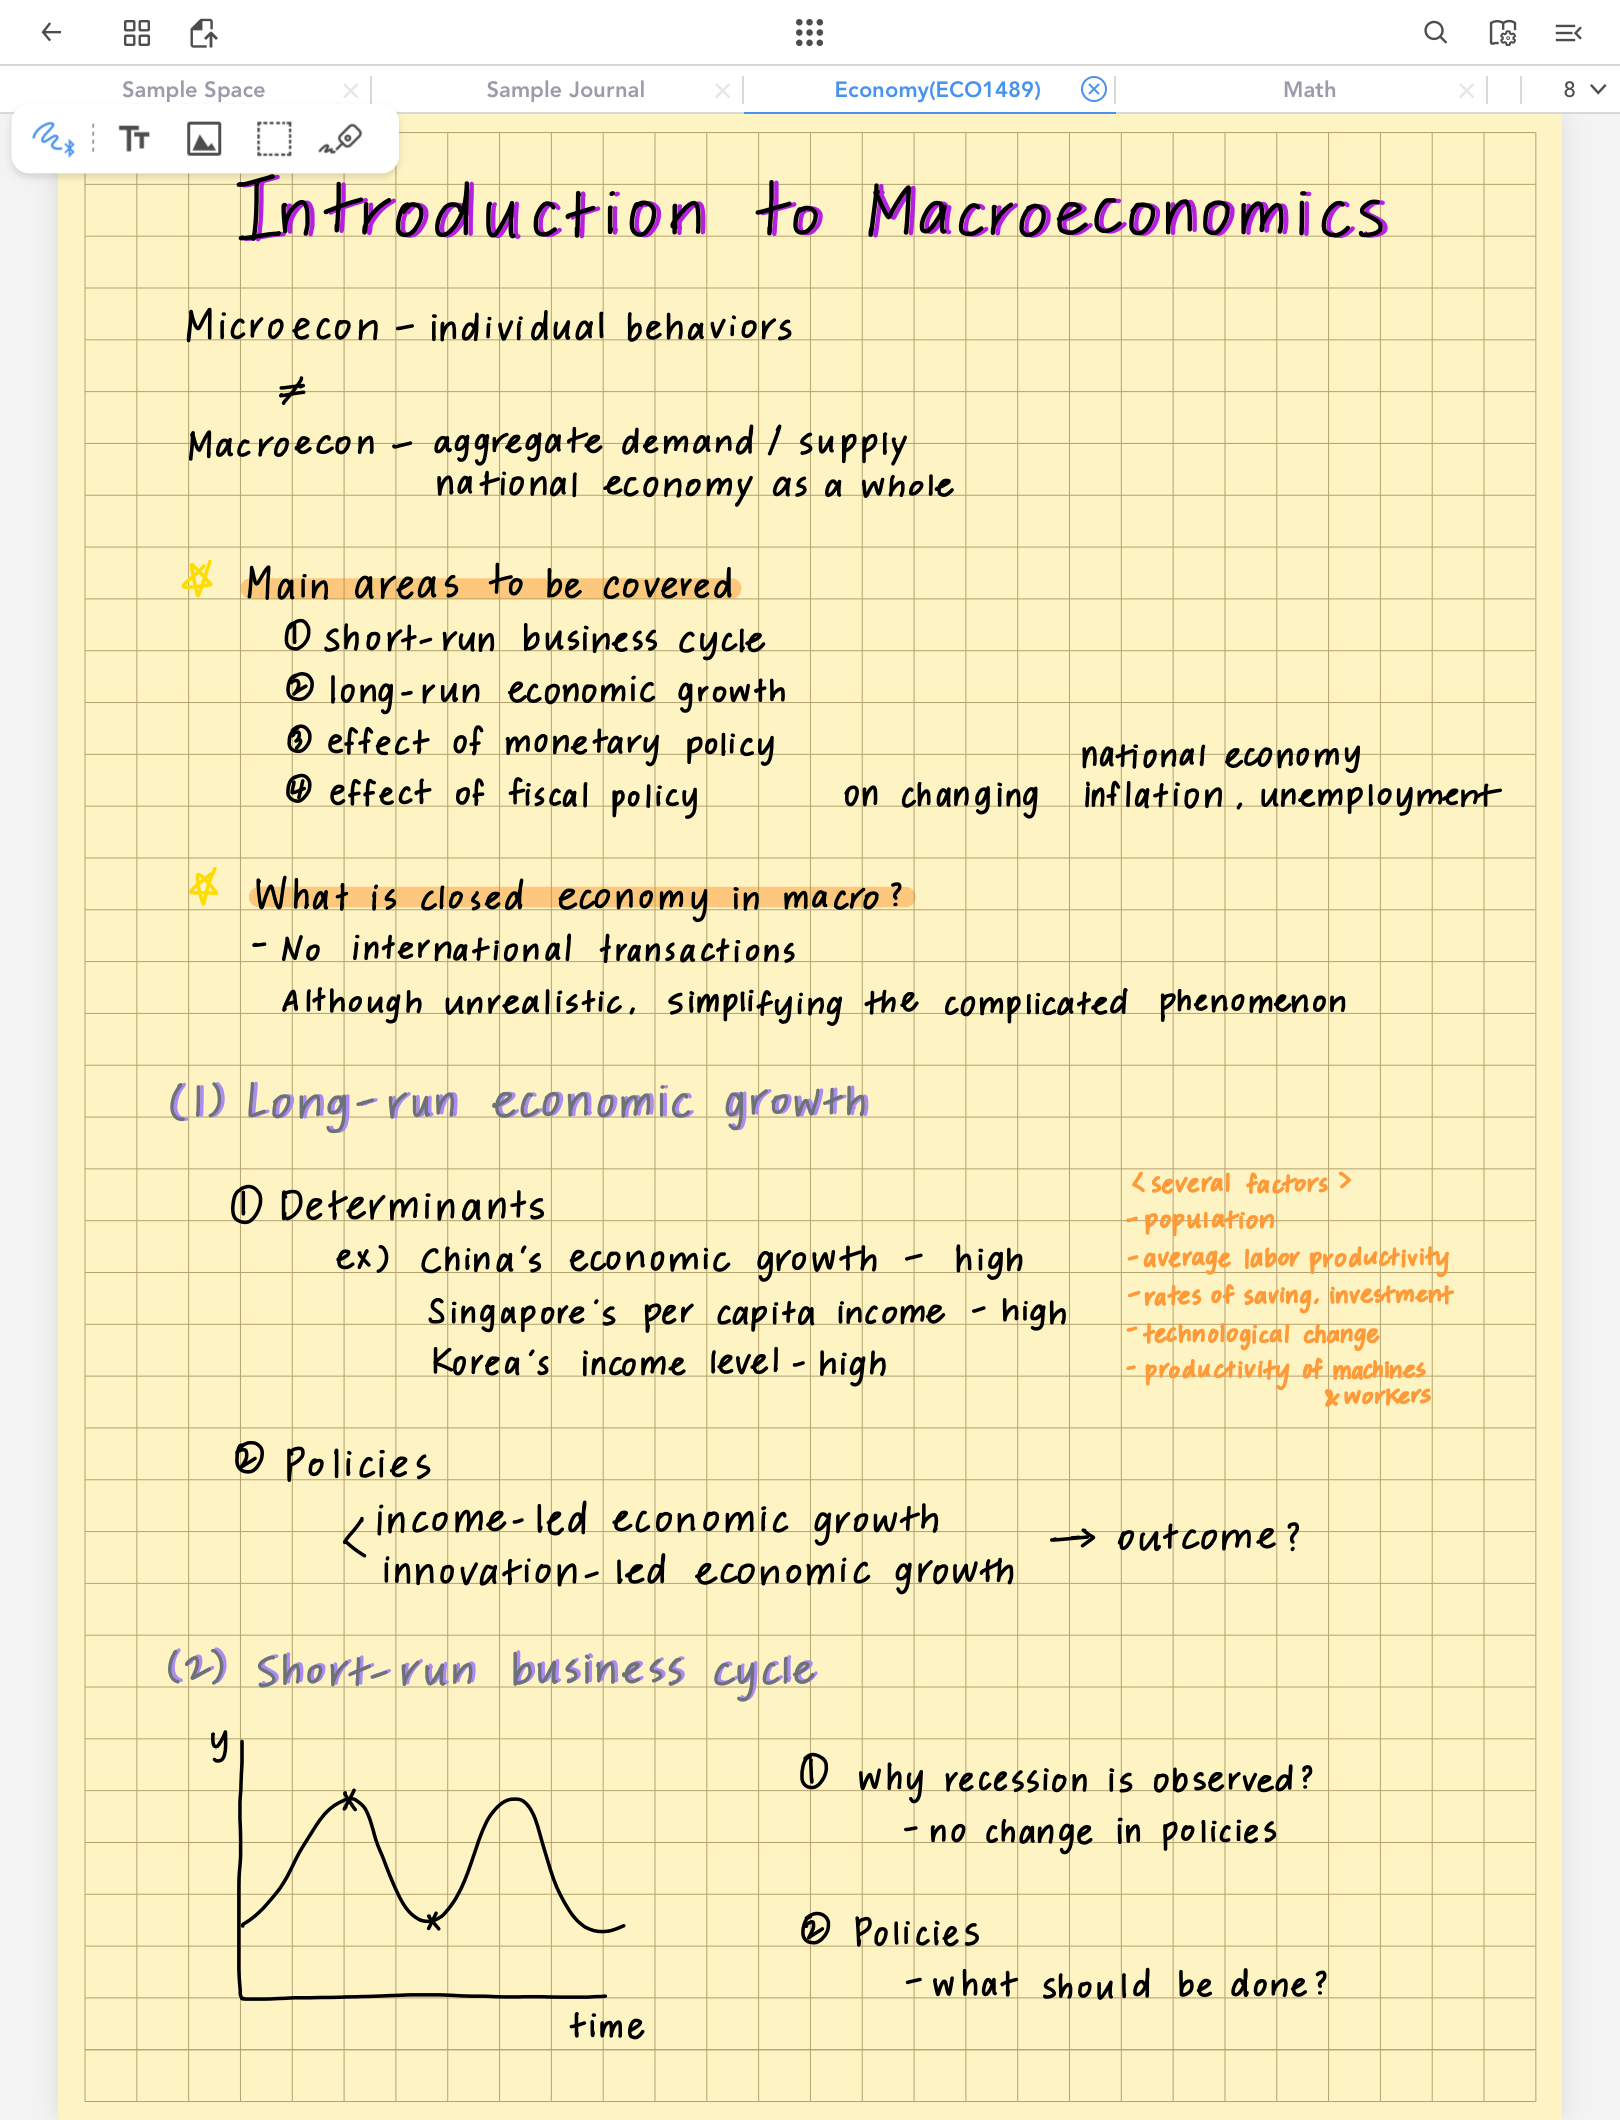
We’ve finished taking notes so let’s upload it on Notion.
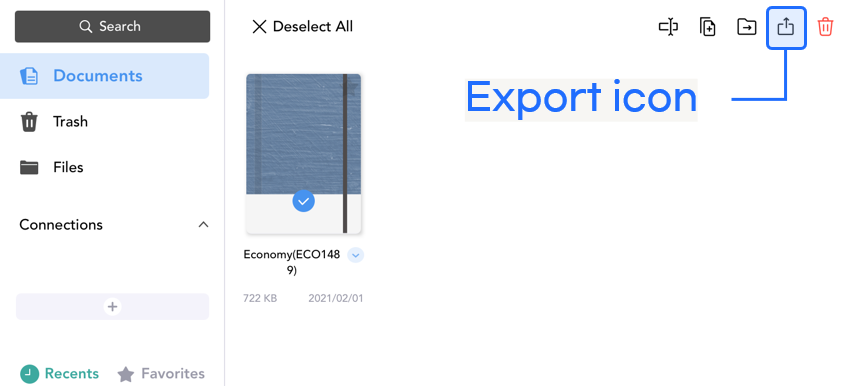
If you press and hold the note in the document list, it will switch to editing mode. Then you can press the export button in the upper right corner.
If you select the Notion app from the export option, you can see the screen below!
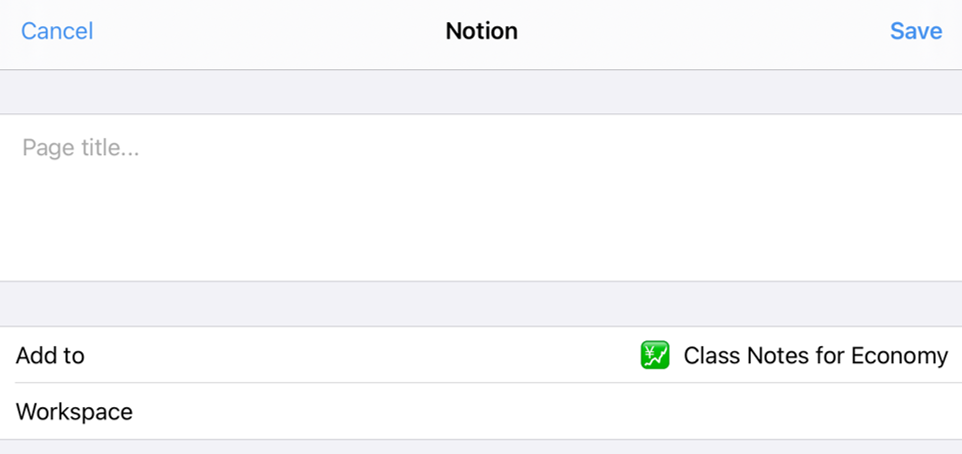
If you press ‘Add to’, you will see a list of pages you have created, so I’ll select ‘Class Notes for Economy’.
You can post it as it is, but wouldn’t it be easier to distinguish if you set the title for the note?
Enter a title and press save to finish! If you open Notion, you would be able to see the note that is exported from Flexcil.
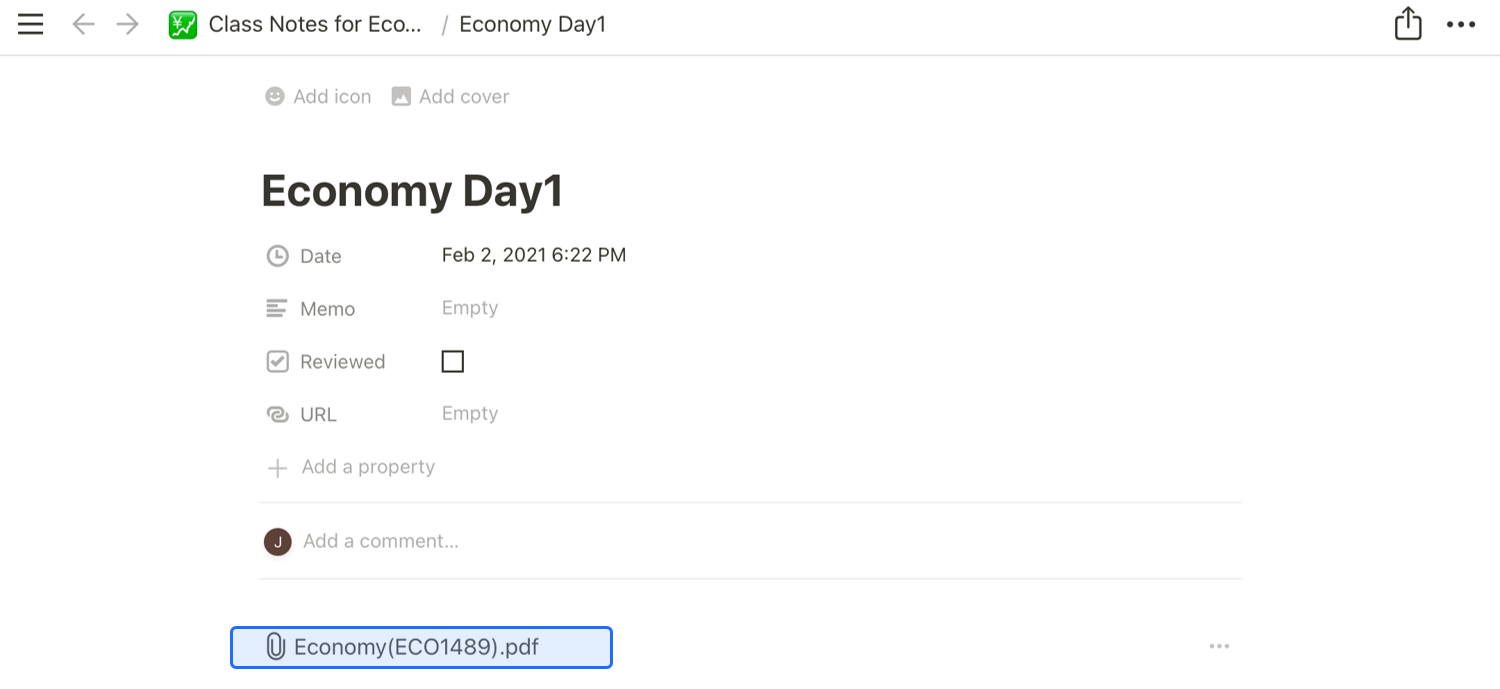
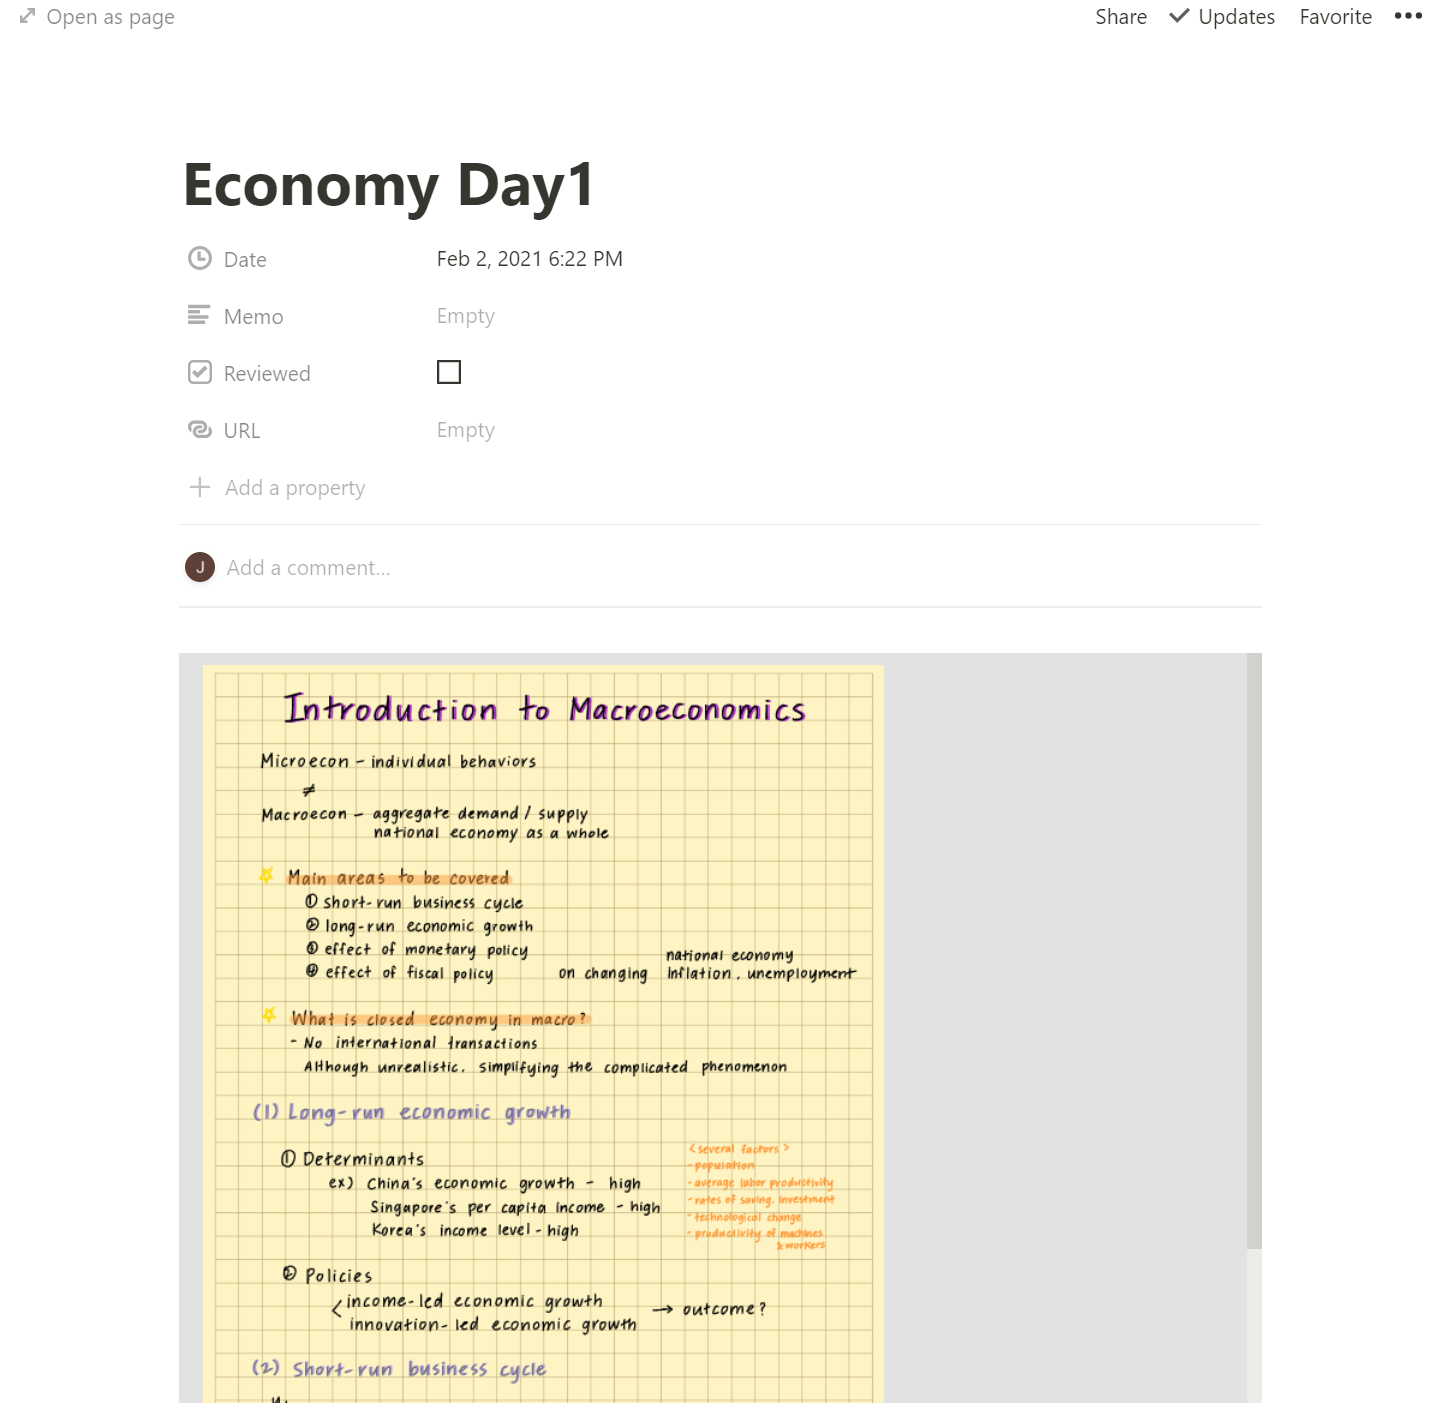
Tap the file to see the notes you’ve made in Notion app. You can check your notes right away if you check the app for Windows or the web!
If you add a URL or notes on the website for your reference,, it will help you review or study for the exam later.
It looks a bit complicated, but if you set it up well at first, then you can simply collect and manage your course materials by creating notes from Flexcil > Export).
I think you can upload the meeting proceedings or work-related materials as well as the class notes!
More tips
You can export pages created in Notion as PDF. Thus, one way to use Notion and Flexcil would be to type texts in Notion and use Flexcil when organizing notes in your own words
Today we looked at how to create and manage lecture notes using both Flexcil and Notion.
Do you have any tips for using Flexcil? If you let us know, we will share it with other users through blogs and newsletters.
Feel free to contact [email protected]!
